If you have noticed cracks forming in your driveway, sidewalk panels heaving near a large tree, or foundation issues that seem to be getting worse, tree roots may be the culprit. It is a frustrating situation. You want to protect your home, but you also do not want to lose a tree you have spent years watching grow.
The good news is that professional arborist consulting can help you do both. When root barrier installation is planned well and installed carefully, it helps redirect root growth away from the places where conflict starts.
This guide walks through how root barriers work, when they make sense, what the installation process involves, and what they realistically cost.
Quick Answer: What Is a Root Barrier?
A root barrier is a physical panel, sheet, or membrane installed in the ground to redirect or block the lateral spread of tree roots. A helpful way to picture it is as an underground fence. Instead of keeping something in, it keeps roots from moving toward a foundation, sidewalk, driveway, or utility line.
Root barriers do not harm the tree when installed correctly. They guide roots downward and away from sensitive structures. Most barriers are installed vertically and range from about 18 inches to 48 inches deep, depending on the species, soil, and site conditions.
When homeowners ask, “Do root barriers work?”, the honest answer is yes, often very well, but only when the right material is installed at the right depth in the right place. That is why tree root barrier installation is as much about planning as it is about digging.
How Root Barriers Work
Understanding what a root barrier does and does not do helps you make a better decision for your property. A barrier is not a magic shield. It is a practical tool that works best when properly sized, positioned, and installed, with both tree biology and site conditions in mind.
The Mechanics of Redirecting Root Growth Deep
Tree roots generally follow the path of least resistance. They grow toward moisture, oxygen, and loose soil, which is often found just beneath pavement, along irrigation lines, or near the softer fill around a foundation.
A well-installed root barrier intercepts that path by creating a solid vertical wall the roots cannot easily penetrate. Instead of continuing outward, the roots are redirected downward, where they can keep growing without threatening nearby structures.
The key word here is redirected. A root barrier is not a root killer. The tree’s root system can still expand, just in a different direction. That distinction matters for tree health, which is why barrier depth and placement are so important.
Long-term Impact on Soil and Hydrology
One concern homeowners sometimes raise is whether a root barrier might disrupt water flow or soil health over time. It is a fair question.
Rigid, impermeable barriers can affect how water moves laterally through the soil. In some sites, that may create drier or wetter conditions on one side of the barrier if the system is poorly planned. That is one reason material choice matters. HDPE barriers work well in many situations, but on sites with drainage concerns, a permeable mesh barrier or a different layout may be the better fit.
A knowledgeable installer will look at soil type and drainage issues, slope, and irrigation before recommending a material or configuration. That site-specific thinking is what separates a helpful installation from a problematic one. The goal is to solve one problem without creating another.
When is Root Barrier Installation Necessary?
Not every tree near a structure needs a root barrier. The real question is whether root growth is causing damage now, or is likely to cause damage based on the species, size, age, and distance from what you are trying to protect.
In most residential settings, there are three common scenarios where root barrier installation is clearly worth considering.
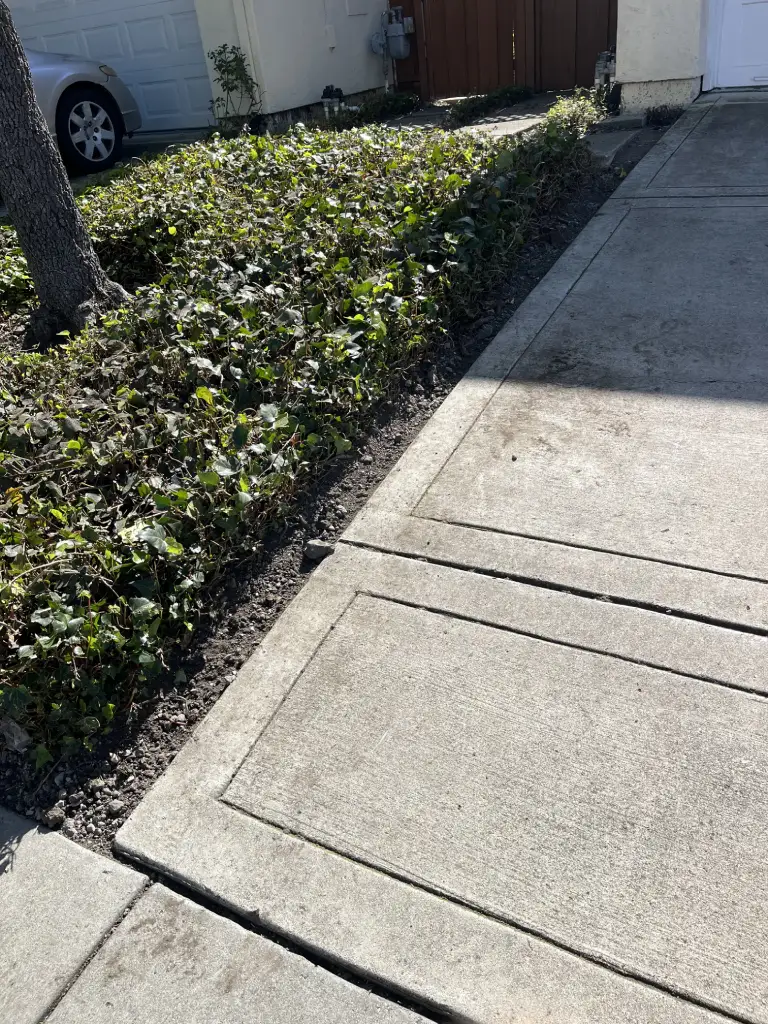
Protecting Foundations, Sidewalks, and Driveways
The most common reason homeowners look into a foundation root barrier is damage to hardscape or nearby structures. Sidewalk panels that lift and crack, driveways with long fractures, or recurring movement near a foundation are all signs that roots may be reaching places they should not. This is also why it helps to think early about how to avoid damage to your foundation before root pressure becomes more serious.
It is worth keeping one point in mind. Roots do not “attack” foundations. They grow toward water and open space, and foundations often create favorable conditions around them, especially older foundations with minor seepage or disturbed soil nearby.
A foundation root barrier placed between the tree and the structure helps intercept that root path before damage gets worse. The earlier you act, the more options you usually have and the lower the overall cost tends to be.
Containing Invasive Species (Bamboo & Aggressive Roots)
Some plants make root management especially urgent. Running bamboo is one of the clearest examples. Silver maple, weeping willow, and certain poplars can also spread aggressively under the right conditions.
In these cases, a root barrier is not just protective. It is often essential for keeping the plant within bounds. Bamboo, in particular, requires a denser, deeper, and more carefully seamed barrier than a standard tree installation because rhizomes are persistent and very good at finding weak points.
If you are considering planting bamboo, or already have it spreading, this is one of those situations where prevention is much easier than cleanup later.
Pre-Planting Defense vs. Remedial Installation for Existing Trees
Root barrier installation makes sense at two very different moments, and the approach changes depending on which one you are dealing with.
Pre-planting installation is the simpler and more effective scenario. When you are planning tree planting and transplanting near a structure, a barrier can be installed before the tree goes in the ground. You are working with undisturbed soil, no established roots, and a clean trench. That makes the project more straightforward and less invasive.
Remedial installation for an existing tree is more complex. Roots must be located, assessed, and sometimes pruned before the barrier can be placed. That takes arborist judgment, not just excavation work, because removing the wrong root can affect the tree’s stability or long-term health.
The good news is that an existing tree does not automatically rule out a barrier. It usually means the plan needs to be more careful.
The Arborist’s View: Risks to Tree Health
This is the part that many general root barrier guides barely touch, and it is one of the most important. Installing a physical barrier means working near or around a tree’s root system, which carries real risk if done carelessly.
The Dangers of Cutting Structural Roots
A tree’s root system does more than absorb water and nutrients. It also anchors the tree in place. Structural roots, especially those in the top 12 to 18 inches of soil, play a major role in keeping a mature tree upright during wind and storms.
Cutting these roots carelessly, or cutting too many at once, can make a tree unstable even if it looks fine above ground for a season or two. The highest risk is usually with large, mature trees and roots located on the windward side.
A qualified arborist looks at how much of a tree’s roots can safely be removed and which roots need to stay intact. That decision should be based on the specific tree and site, not on a one-size-fits-all rule.
Calculating the Critical Root Zone (CRZ)
The Critical Root Zone, or CRZ, is the area of soil around a tree that contains many of the roots essential to its survival and stability. A widely used guideline is to protect about one foot of radius for every inch of trunk diameter.
For example, a tree with a 12-inch trunk diameter would have a CRZ of roughly 12 feet in radius.
You do not need to memorize the formula to understand the practical point. Large trees usually need more protected root space than homeowners expect. Any excavation within that area should be approached carefully. Working too close to the trunk, or removing too many roots in this zone, can stress or weaken even a healthy tree.
How Professional Pruning Prevents Tree Instability
When root pruning is unavoidable, the way it is done matters.
A certified arborist makes clean, precise cuts that reduce stress and improve the tree’s ability to compartmentalize the wound. Clean cuts are easier for the tree to manage. Torn, crushed, or jagged root ends are much more likely to become entry points for decay.
Professional pruning also accounts for how much root loss the tree can realistically tolerate. In some cases, if major root work is necessary, additional monitoring or canopy management may be part of the recommendation. The goal is not just to get the barrier in the ground. It is to protect the structure without creating a future tree hazard.
Root Barrier Materials: Durability & Sustainability
Choosing the right barrier material is not only about durability. It is also about what fits the site, the species, and the long-term health of the surrounding soil.
HDPE vs. Permeable Mesh vs. Chemical Barriers
The three most common types of root barriers each have their own strengths.
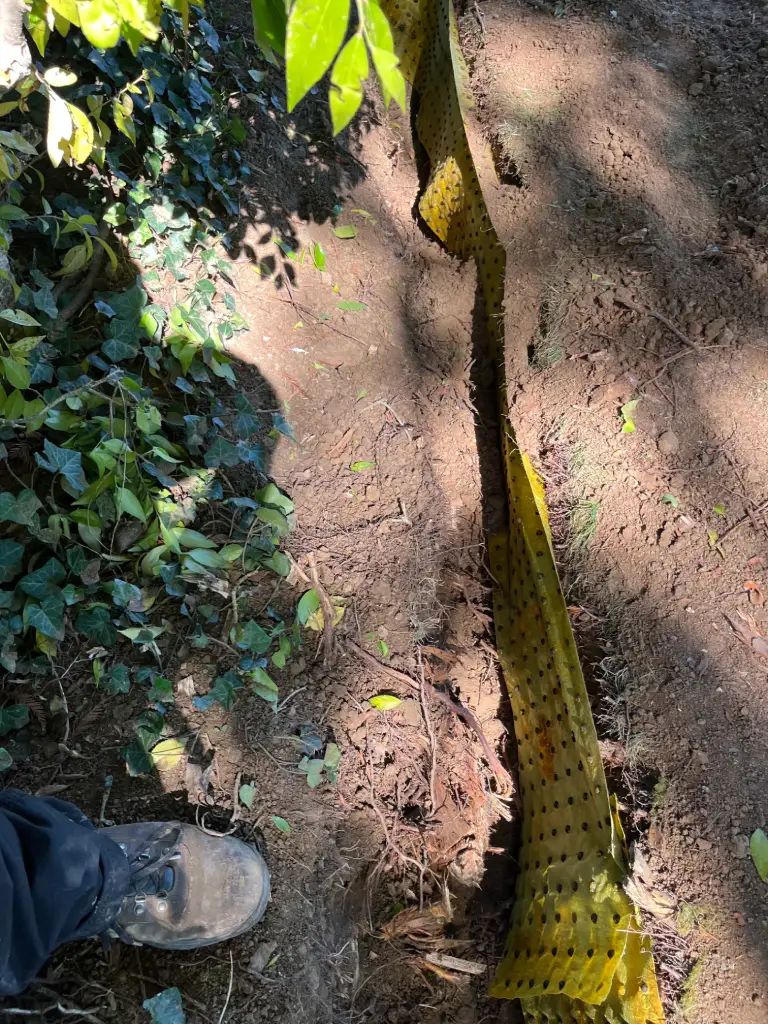
HDPE (High-Density Polyethylene) panels are the most widely used option for root barrier installation. They are rigid, long-lasting, and highly effective at redirecting root growth. In most hardscape and foundation protection scenarios, they are the standard choice.
Permeable mesh barriers allow some water movement through the barrier zone while still discouraging root penetration. They are useful where drainage is a concern and the goal is redirection rather than full containment.
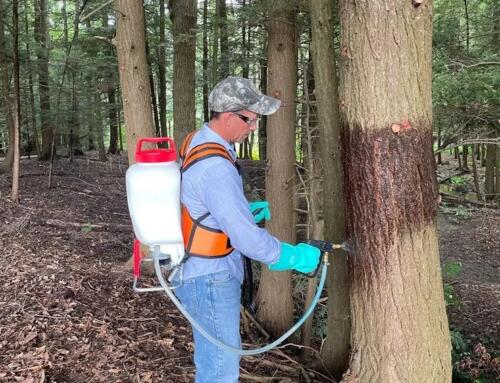
Chemical barriers rely on treated materials to discourage root growth. We generally do not recommend these, especially near food gardens, water features, or sensitive soil environments. Physical barriers usually do the job without introducing unnecessary ecological concerns.
Why We Choose Eco-Friendly & Non-Toxic Materials
At A Plus Tree, we prioritize materials that protect structures without introducing harmful substances into the soil or groundwater. HDPE barriers are inert and non-toxic. They do not leach chemicals, and they perform reliably for decades.
Just as important, we believe protecting tree health is part of the job. A barrier that protects a driveway but quietly stresses the soil environment is not a strong long-term solution. Effective root control and responsible tree care should work together.
Step-by-Step Installation Process (And Why Precision Matters)
From the outside, root barrier installation can look simple. In practice, it involves several steps where small mistakes can create bigger problems later.
Step 1: Site Inspection and Utility Locating
Before any digging begins, the site needs a thorough inspection. That includes reviewing the species, size, and likely root spread of the tree, evaluating how close roots are to the structure being protected, and calling for utility locating to identify underground lines.
Hitting a gas line, irrigation line, or communication cable is completely avoidable. That is exactly why this step comes first.
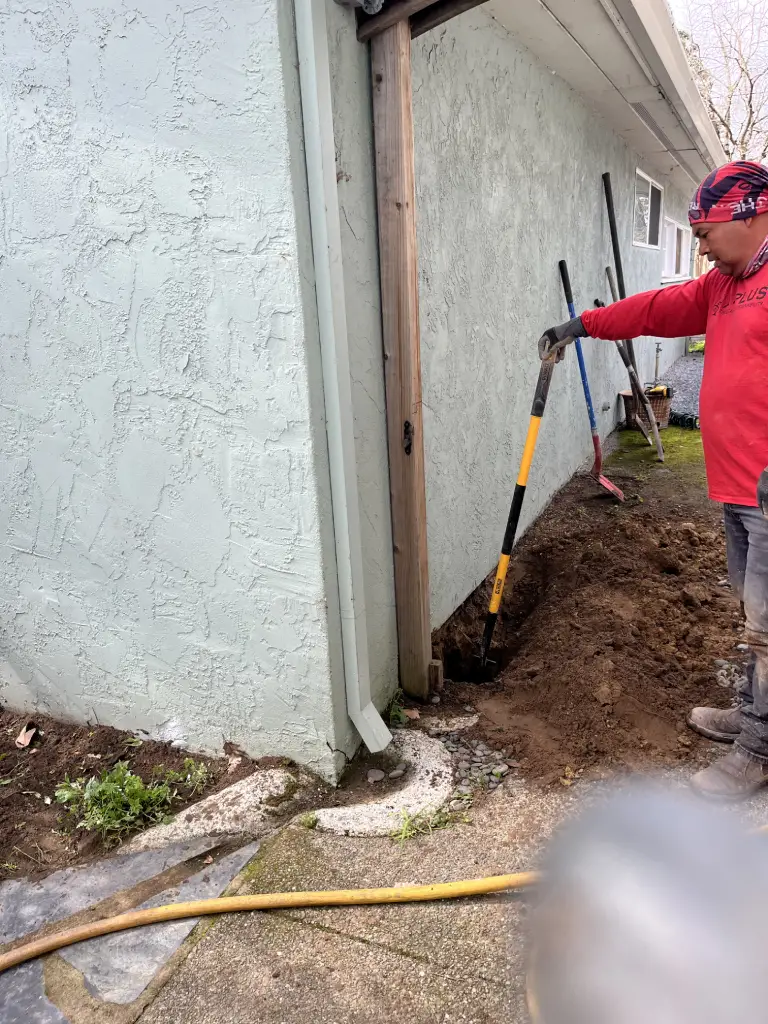
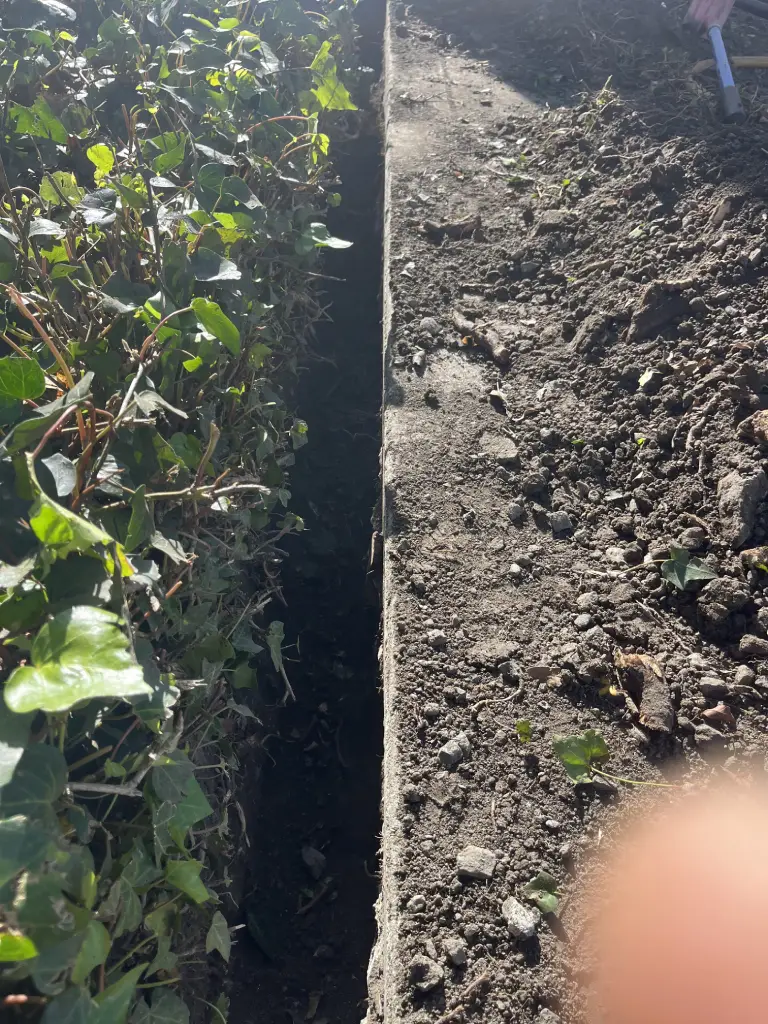
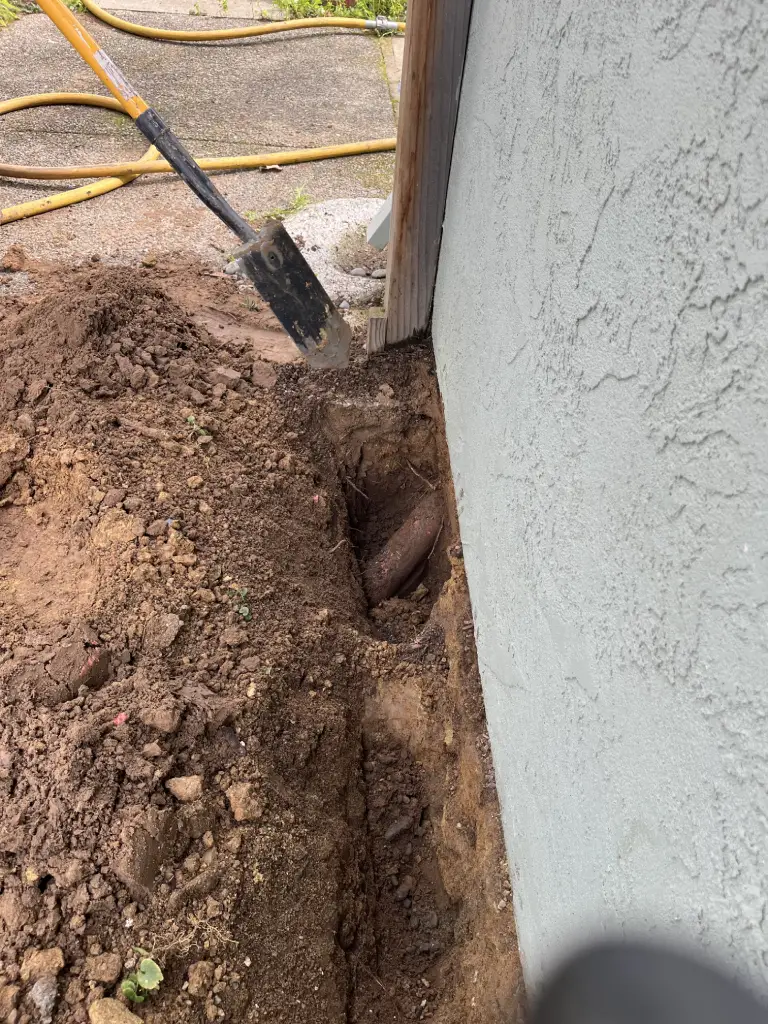
Step 2: Excavation and Root Pruning
Excavation is done carefully, often by hand near active root zones, to avoid unnecessary damage. As roots are encountered, they are evaluated individually.
Small feeder roots can usually be pruned cleanly without major impact. Structural roots require a more careful judgment call. Any root that is removed should be cut with sharp tools, not ripped or torn, and timing may also matter depending on the species and season.
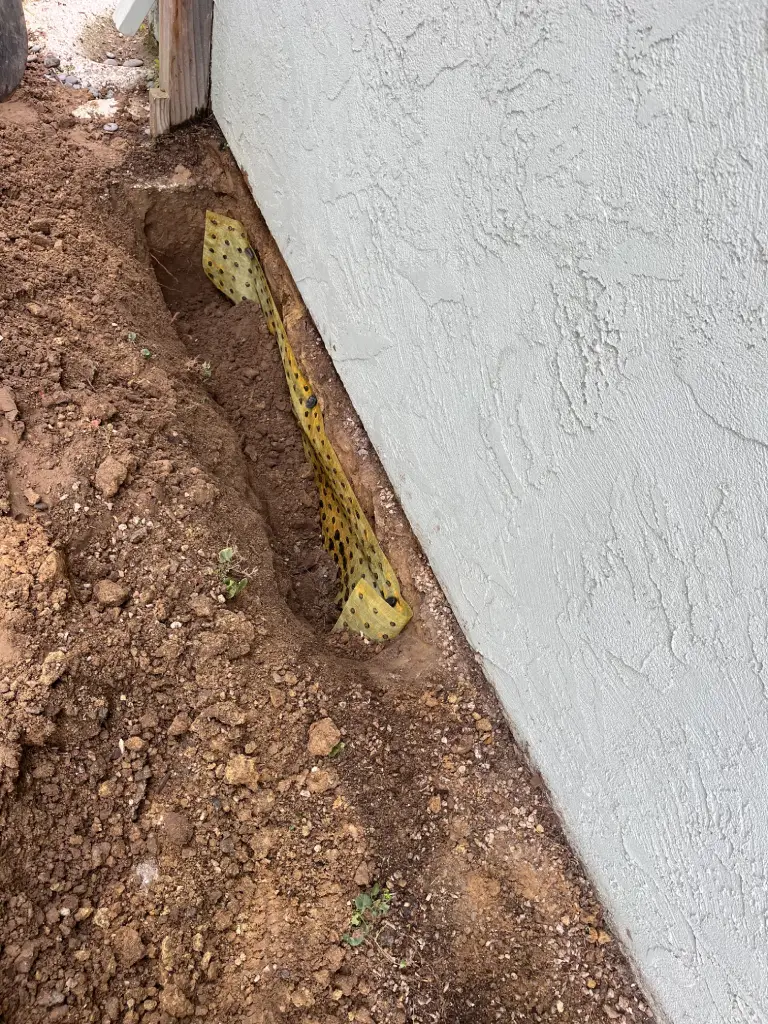
Step 3: Placing and Seaming the Barrier
Barrier panels are installed vertically in the trench. Seams are one of the most important details in the whole system. If there is a gap, roots will eventually find it.
Panels should be overlapped or connected according to the product requirements so the barrier functions as one continuous wall. The top edge is usually set just below grade, often about a half-inch to one inch, so it does not create a tripping hazard or interfere with surface drainage.
Step 4: Backfilling for Soil Health
Once the barrier is in place, the trench is backfilled carefully. The goal is to restore healthy soil conditions as much as possible.
Compacted fill that excludes air and drains poorly can create new root-zone problems. Using native soil, and in some cases improving it with appropriate amendments, helps the area recover after installation. A mulch layer may also help, but good mulch practices still mean keeping it pulled back from the trunk.
Installation Checklist: Don’t Miss These Steps
A quality installation should include all of the following:
- utility locate completed before excavation
- root proximity assessed by a qualified arborist
- structural roots identified and preserved where possible
- clean pruning cuts on removed roots
- barrier depth matched to the species and site
- panel seams properly secured
- top edge positioned correctly below grade
- backfill restored carefully
- post-installation tree health check scheduled
That last point matters. Installation is not always the end of the process.
Root Barrier Installation Cost Guide
Root barrier installation cost varies quite a bit depending on site conditions, tree size, and the amount of work involved. Understanding the main cost drivers makes it easier to evaluate quotes and plan realistically.
Factors Affecting Price (Depth, Length, Soil Conditions)
The three biggest cost drivers are barrier depth, total linear footage, and soil conditions. A shallow installation for a young ornamental tree in soft soil is a very different project from a deep installation along a long stretch of sidewalk in dense clay with mature roots throughout.
Other cost factors include:
- the number and size of roots encountered
- access to the site
- utility conflicts
- material choice
- the level of arborist involvement required
This is one reason generic online pricing can be misleading. Two projects may sound similar but differ a lot once real site conditions are taken into account.
Cost of Prevention vs. Cost of Foundation Repair
Here is the broader point to keep in mind. Root barrier installation is often much less expensive than repairing the damage unmanaged roots can cause over time.
Foundation repair can run into the thousands or tens of thousands of dollars. Sidewalk or driveway replacement can also become expensive once demolition, restoration, and permitting are involved. A properly installed barrier will not be the right answer in every case, but when it is the right answer, it is usually far more affordable than waiting.
Choosing a Professional Root Barrier Installer
Not everyone offering root barrier work has the training to do it safely. The trench itself is only part of the job. The real difference is the arborist judgment behind the excavation and pruning.
Why Certification Matters
An ISA-certified arborist has demonstrated knowledge of tree biology, root systems, and the structural implications of root pruning. That matters when someone is working within feet of your tree’s base.
Ask whether a certified arborist will be present during excavation and root pruning, not just during the initial consultation. That is where expertise matters most, and it is often the fastest way to tell whether you are hiring a tree professional or just a trenching service.
The Importance of Long-Term Health Monitoring
A good installation does not end when the trench is backfilled. Trees that have had root work done near them should be monitored during the months and seasons that follow.
Watch for:
- early leaf drop
- reduced leaf size
- midday wilting on hot days
- branch dieback at the tips
These signs do not always mean something is wrong. Some temporary stress after root disturbance is normal. What matters is whether the tree stabilizes over time or continues to decline. If symptoms persist or worsen, a follow-up tree health care assessment is the right next step.
If you are still not totally sure whether a root barrier is the best fit for your property, that uncertainty is normal too. A site visit can help clarify what is actually happening and whether a barrier is the right solution.
Protect Your Home Without Losing a Healthy Tree
Root barrier installation can be a practical way to protect your home without giving up a healthy, established tree. When it is planned well and installed carefully, it helps redirect root growth away from the places where conflict starts.
The key is not just putting a barrier in the ground. It is matching the barrier to the tree, the soil, and the structure you are trying to protect. That is what gives the system its best chance of working well over time.
If you are seeing cracks, lifted hardscape, or roots surfacing too close to your home, it usually makes sense to assess the situation early. The sooner you understand what is happening below ground, the easier it is to choose the right next step.
FAQ About Root Barrier Installation
How Deep Should a Root Barrier Be?
Most root barriers are installed 24 to 36 inches deep. The right depth depends on the species, soil, and structure being protected.
Will Cutting Roots for a Barrier Kill My Tree?
Not when it is done properly. Clean, targeted pruning by an arborist usually causes only temporary stress, not lasting damage.
Can I Install a Root Barrier Myself?
For small shrubs or young trees, possibly. For established trees near structures or utilities, professional installation is the safer choice.